It’s back to school time here in the Midwest and that got us thinking about the things that lead to a passing grade when it comes to battery service. If you read our articles regularly, you know that there are things to watch out for and things that should always be done if you want great results when jump starting, charging, testing and maintaining batteries. This month, we thought we’d hit you with a 9-point cheat sheet that, if you follow these guidelines with consistency, will enable you to achieve a top grade when it comes to battery service. Plus, we’ve added three Bonus Pro Tips at the end of the list for our professional technician audience members. Enjoy!
Cheat Code #1 – Simple Steps Increase Your Safety

At Clore, we’re all about safety. The reality when dealing with vehicle starting batteries is that they should be respected because they have tremendous energy potential. This means that you should read the manual of the equipment you use to interact with vehicle batteries and understand the steps you should take to use that equipment in the safest manner possible. This includes wearing protective gear (goggles, etc.), removing items such as rings, ensuring that nothing can gets caught in a belt or fan and removing yourself and others from the battery when performing tasks such as jump starting.
It also means that you should visually inspect both the battery to be serviced and the equipment you are using to service it. Is the battery case cracked? Are there other obvious defects in/on the battery? If so, the battery should be taken out of service. Does the battery appear to be frozen? If so, do not try to charge or jump start it. Determine why it is frozen. A healthy battery doesn’t freeze except under the most extreme circumstances. Check your equipment for issues. If your equipment has an AC input cord, is the plug damaged or the cable frayed? Are the output cables intact and the clamps in good condition? If there are issues, have your equipment serviced before using it.
Finally on this topic, it is important to take your time when servicing batteries to ensure you are following procedures as directed, including following the proper order of operations, checking polarity before connecting, and respecting the prescribed duty cycle of any equipment you are using. Taking the time to prepare and follow best practices goes a long way toward increasing your overall safety when working on and around vehicle batteries.
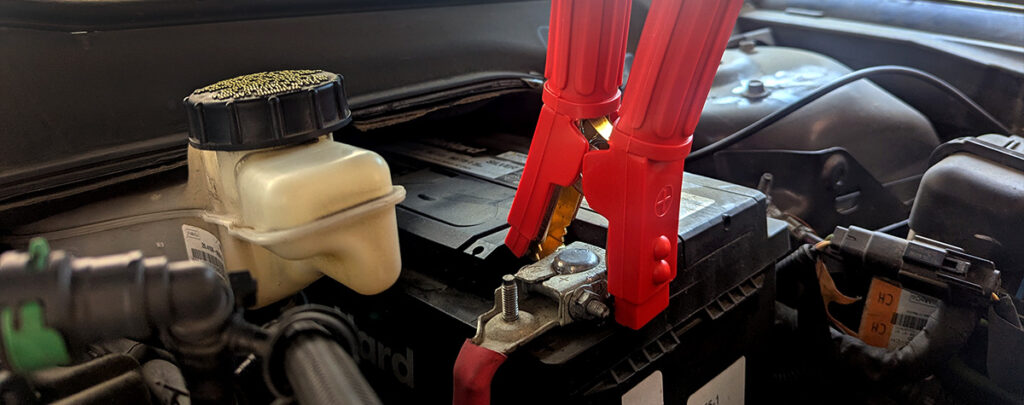
Cheat Code #2 – Negative Always Goes to Ground
We have beaten this one to death in the last few years, and for good reason. When making a battery connection, the proper procedure (for jump starting or battery charging) is to connect the positive lead to the battery positive terminal and then connect the negative lead to an engine or chassis ground. The first reason why you should do it as prescribed is safety related. By making the second connection and completing the electrical circuit at a proper vehicle ground, you are doing it away from the battery. So, if a spark occurs while completing the circuit, that spark occurs away from the battery. Why is this important? Well, you might have just been trying to start that vehicle unsuccessfully and the vehicle’s battery likely expelled flammable hydrogen gas fumes in the process. We don’t want a spark to occur anywhere near those fumes (this is also why you want to always wear protective eyewear, by the way).
The second reason has to do with modern electrical system designs. Because today’s vehicles typically use sophisticated charging circuitry controlled by the PCM, they are monitoring many variables to dynamically charge the battery when the vehicle is in operation. This includes current sensors, usually located in the battery positive cable, that monitor how much energy is being delivered to the battery. If you connect both leads to the two battery posts, you are bypassing these sensors, which causes confusion in the charging system and can result in an overcharge condition that would reduce vehicle battery lifespan. Nobody wants to shell out for a new battery at today’s high costs any earlier than they absolutely have to.
It typically takes less than five minutes to locate a good engine or chassis ground in each of your vehicles’ engine compartments. Some vehicles even have designated starting points to eliminate the need to connect to the battery directly. We believe that taking just a few minutes to really know the best ways to interact with your vehicle is well worth it.
Cheat Code #3 – Jump Starting – Remember to Get Your Charge On

This is a quick one. If you own a jump starter, no matter the type, charging it regularly is the single most beneficial thing you can do if you want to get the longest service life from it. This is true whether the battery inside is a sealed lead acid AGM battery or a lithium battery. Charge it every 90 days when you haven’t used it. Charge it after you use it, especially if you used it as a power supply, such as to power an air compressor or other connected equipment. Batteries don’t like to be excessively discharged and leaving them for a prolonged period in a discharged state is a sure way to reduce their lifespan.
Cheat Code #4 – Battery Charging – Make Sure Your Input is Correct

There are a lot of different vehicles, different electrical systems and different types of service equipment. And many operating system voltages. For anyone who ever stuck a fork into an AC outlet as a kid, you know that voltage is not something to mess with. While ICE vehicle electrical systems and EV low voltage systems have much lower total potential than the wall socket, that doesn’t mean you shouldn’t take them seriously. Always confirm that the vehicle’s operating voltage matches your equipment’s voltage.
Cheat Code #5 – Battery Charging – Match Your Charger to Your Battery Type

This one’s gotten better over the years, but there’s always a new reason for confusion. How has it gotten better? Battery manufacturers and vehicle OEs are doing a much better job of identifying AGM batteries today than in the 2008-2012 period, when AGM batteries often weren’t even labeled as such. Conversely, lithium batteries are sneaking into more starting applications, so the chance for mismatching battery type still runs rampant.
Similar to matching voltages, and for similar reasons, when you are charging a battery, it is critical to match your charging profile to the battery type being serviced. While it is not as critical for flooded lead acid batteries, AGM, Spiral Wound and Lithium batteries are all extremely sensitive to over-voltage conditions. As such, charging these batteries using the wrong charge profile can be very detrimental, causing battery degradation and shorter service life at best and creating dangerous conditions that could result in vehicle damage and personal injury at worst.
We’ll also throw in a quick word here on jump starting and battery type, since we get this question often. While matching charge profile and battery type is critical when charging, it is general of no consequence when jump starting (though matching voltages is always critical – reread Cheat Code #4). When jump starting, you are essentially augmenting the vehicle’s starting battery, not pushing energy into it. As such, it is fine when jump starting to use a lithium jump starter on a lead acid starting battery and vice versa.
Cheat Code #6 – Battery Charging – Low and Slow is the Way to Go

You might find this repetitive, but it bears stating. It is a best practice to match your charging rate to the size of battery you are charging, like you match your voltage and charge profile. We have always (going all the way back to our Century Manufacturing early days) advocated that, when time allows, low and slow is the way to go. That means when you’re charging small batteries (jump starters, lawnmower batteries, powersports batteries), choose a low rate of charge, such as 1A, 2A or 4A, depending on battery size. For typical vehicle starting batteries, we recommend charging at 10-20A rate of charge. The one exception is pure lead (lead-lead) batteries, which actually prefer a high rate of charge (amp rate equal to the amp hour rating of the battery).
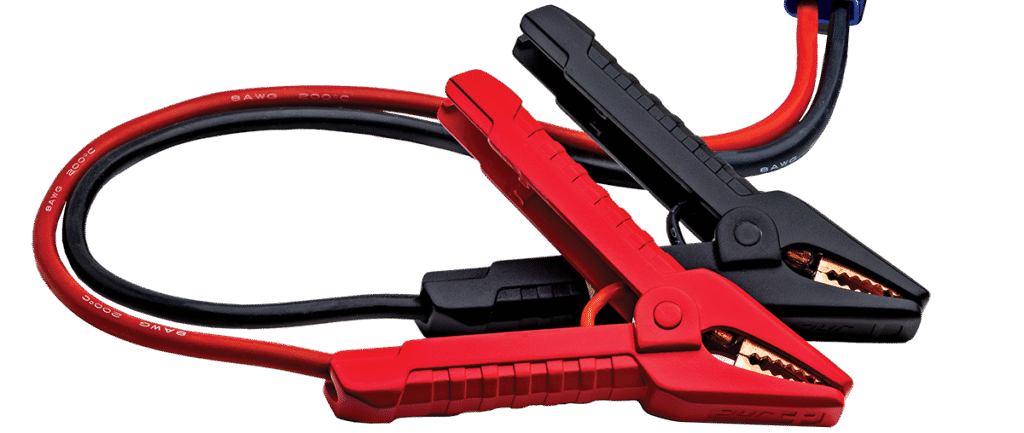
Cheat Code #7 – Battery Charging – Connection Quality is Critical
Just like vehicle electrical system connections, which can experience huge problems if they are not properly well secured with good connectivity, it is critical that you make good, solid connections when you connect your battery charger (or other equipment). Check battery terminals for corrosion and remove it before connecting if it is present. Make sure you get as much surface contact between your clamp jaws and the battery terminal or ground as possible. Having only a small percentage of the jaw making contact means that all of the energy pouring into the battery from your charger is passing through a very small surface area, which increase heat at the connection, which could result in smoke or worse. Good, strong connections are critical to success.
Cheat Code #8 – Battery Testing – Invasive Testers Require 85%+ State of Charge (SoC)
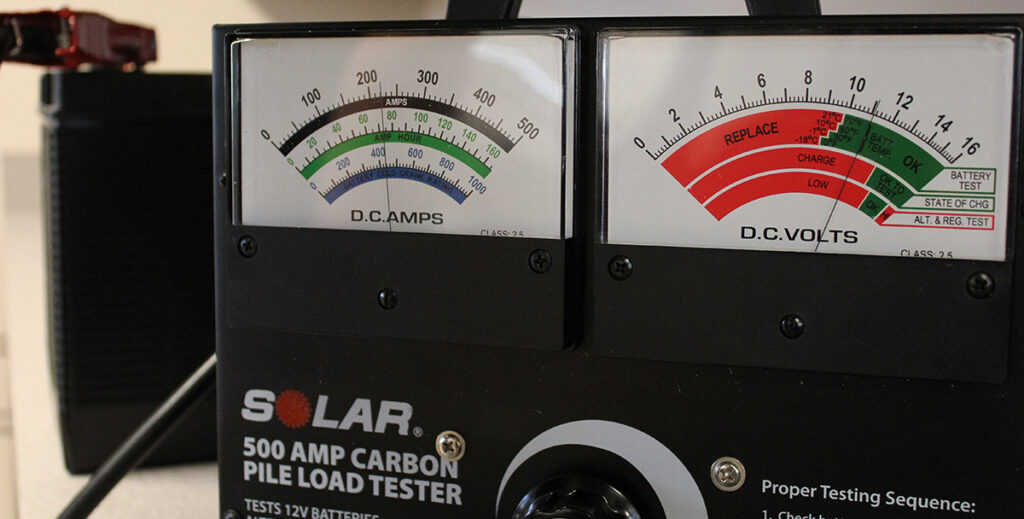
When using an invasive load tester, whether it’s a traditional cheese-grater style tester or a more sophisticated carbon pile tester, it is critical that the battery being tested is at or above an 85% SoC. If the battery’s SoC is below this level, the result derived from the testing process is unreliable and likely inaccurate. Yes, it adds time to get depleted batteries above this threshold, but it is absolutely necessary if you want accurate results.
Cheat Code #9 – Battery Maintenance – Float is Not Your Friend
At Clore, we’ve been saying for 13+ years that using a battery charger that executes a simple float charge upon the battery reaching full charge is less than ideal. Yes, it’s better than doing nothing and allowing a battery to discharge over time. Also, it’s fine if the battery will be put into service shortly after reaching full charge. But, if you are intending to perform long-term storage charging, for instance on a trolling motor during the offseason, we’d say there’s a much better way to go. Our PRO-LOGIX battery maintainers execute an enhanced maintenance routine that rests the battery upon reaching full charge, then exercises the battery before performing a new, full charge cycle, over and over again: a continuous rest-exercise-full charge cycle loop. What we have found, in years of lab studies as well as extensive field experience, is that this enhanced maintenance routine restores battery reserve capacity and extends battery life.
BONUS PRO TIPS

When Module Reprogramming, Start with a Good Battery
Module reprogramming can be a little like Forrest Gump’s box of chocolates – you never know what you’re going to get. An expected 25-minute reprogramming routine could go two hours, while an expected two-hour routine might go five hours. During the reprogramming event, the battery, and keeping its voltage above a critical threshold, is crucial for success. That’s why a flashing power supply like our PRO-LOGIX PL6850 is used to maintain system voltage at an OE-mandated level. If the battery is fundamentally compromised, it can behave very strangely during the reprogramming event, such that it could jeopardize the process entirely, resulting in time wasted or even a corrupted module. So, before starting a reprogramming event, check battery health and SoC to be sure that you won’t be fighting a substandard battery throughout the process.

Battery Testing – Electronic Testers are Only as Good as Their Judgement Maps
This one is a bit more complicated, but it makes sense when you boil it down. Electronic testers work by comparing how any specific battery reacts to a pulse of energy sent through it versus what is normal for that battery type. But, that’s the rub. An electronic tester needs to have different judgement maps for different battery types, each of which reacts differently to that pulse of energy. So, it’s important to be able to specify the type of battery you are testing to line up the reference criteria that is used to determine a pass/fail result. So, if your tester has just one or two battery types to choose from, we’d question how it could possibly be accurate. For instance, our BA Series electronic battery and system testers test six different lead acid battery types, and that count is growing all the time as battery types used in the North American carpark proliferate.

When Using a Memory Saver, Protect Those Cable Ends
Memory savers and memory saver cables can be very useful tools when changing out batteries. We sell a bunch of our ESA30 Memory Saver Connectors for use with any jump starter that has a 12 Volt power outlet. When using a memory saver, though, a few steps can make its use much safer and effective. No step is more important than securing the battery cables/harnesses as the old battery is removed. Remember, with the memory saver connected, the system is live, so those battery cables are also live. The last thing that you want is for those cable ends to make inadvertent contact with other system components. We suggest following best practice and securing them with a non-conductive booty until the new battery connections are made.
We hope that this battery service cheat sheet is helpful for you as we approach a new fall and winter season. Remembering these simple steps can make a big difference between success and failure when working on your vehicle’s battery and electrical system.
What did we miss? Do you have a secret cheat code that enables you to interact with a vehicle electrical system like a superhero? Your fellow readers would love to hear about it in the comments below.